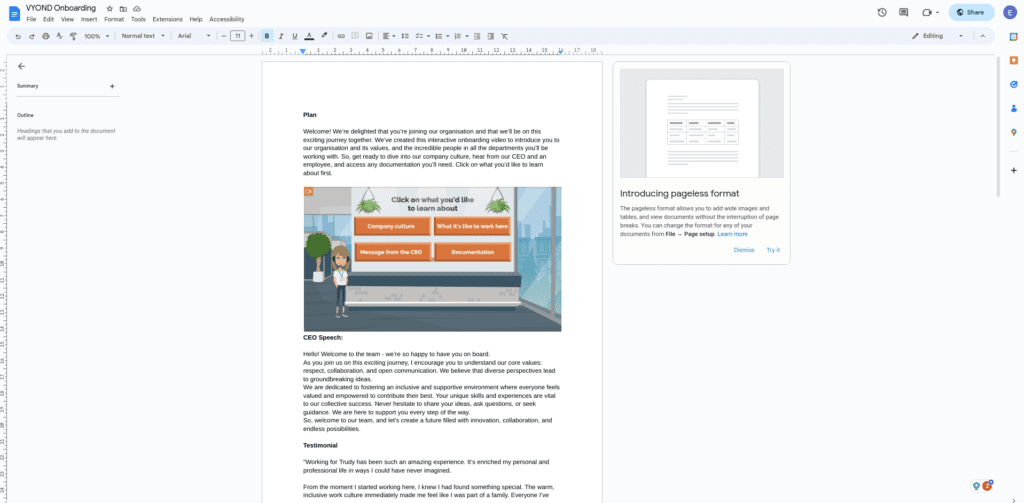
Team member, Ellie, explains how she made an interactive Vyond video using their onboarding template with Near-Life, which can be embedded on a website or shared directly.
VYOND recently introduced a template that simplifies the process of creating onboarding videos. Inspired by this, I decided to use this template to demonstrate how Near-Life can be used to make your onboarding videos interactive. In this blog, I will share my step-by-step process of making an interactive onboarding video using VYOND and Near-Life.
Planning and voiceovers
To begin, I created a comprehensive plan outlining the sections I wanted to include in the onboarding video, and scripts for each section. This involved a message from the CEO, introductions to various departments, and links to relevant documentation. I carefully considered the user’s journey through the video and identified key points for interactivity. If you want to look at the plan I wrote, check it out here.
The next step was to complete the voiceovers. For this, I reached out to a few other members of the team to help me out and provided them with the scripts so they could record the audio.

VYOND
Next, I loaded VYOND’s template. If you’re short on time, this is an awesome way to minimise your workload, though you do still have the option to start from scratch if you’d rather. I could then go through all the scenes and personalise them. VYOND even lets you create your own characters that you can personalise to look like people from your team! Alternatively, you can use the ‘replace’ feature to quickly swap out one character for a different one, but still keeping the same actions/movements as the original.
After personalising the scenes, I uploaded the voiceovers and put them in the right place. If you want your character’s mouth to be moving (talking) while the voiceover plays, make sure the facial expression is reset.
When I was happy with all the scenes, I could download each one. To do this, you need to save each scene as an individual video. To start with, you can highlight your first scene and any audio you want with it, right click it and click to save as a new video. It will then give you the option to open it as a new tab. From here, name your scene and download it. For longer scenes, this can take a couple of minutes. You can save time by downloading it in lower quality. I did this for my video, and I found the difference in quality was minimal.

Near-Life
Next, I went onto Near-Life. I created a project and added my first scenario. I then named it. You can go to the settings tab to decide your settings for the video – such as removing scoring/pass score and deciding how buttons will appear (should you decide to use them).I then clicked on the media tab and uploaded all of my scenes. You can drag and drop scenes into the right place, or select it from a drop-down tab on the individual node. I put the first scene in the first node on the screen. For me, this is a start screen. I then added a hotspot rectangle, named it ‘Start’ and highlighted the start button. I then clicked ‘create new’ under the ‘Go to’ tab, to make a new node that that button would lead to.
Now I had a second node on the screen. I dragged the second scene onto it – this is the introduction + the menu where you decide what to see first. I slid the timeline along to see when the menu first comes up. I then added hotspot rectangles around each option and created a new node for each one to go to a different place. Make sure your overlays appear as soon as the interaction comes up on the screen. You can do this by clicking ‘show overlay timelines’ and sliding them to the right place.

I now had 4 new nodes on the screen leading from the menu before. I could then drag and drop the right media into each one. It’s important that if there is no interaction in your scene, for example, if you have a message from the CEO, you will probably want the video to lead back to the main menu after it’s ended. To do this, click on the node with the video on and set ‘default’ to your menu node.
If you have a scene with an interaction, such as the main menu, you may want to select the ‘freeze frame at end’ option. This means that even if the video you’ve made runs out of time, the video will freeze at the end until the user has made a choice or interacted.
I continued putting the right media in the right nodes. I made sure to have an ‘exit video’ option on my main menu for when the user is done viewing everything. After clicking this, I asked the user how they found the video. This makes use of Near-Life’s ability to track insights into interactions, so you can then see how people found the video and use it to make the experience as helpful as possible.

Sharing
When I had everything in place, I previewed the video a few times to make sure it was playing exactly how I wanted. When I was happy with it, I could then publish it and copy the link to share it with my team for feedback. Remember – if you don’t publish it, nobody will be able to see it but you. In the sharing option, you have the option to share, embed, SCORM or LTI launch URL. If you want to know the code for embedding a video responsively on WordPress, check out our blog here.

Want to create your own interactive videos?
Click here to learn more about how Vyond and Near-Life work well together, or book a demo to speak with one of our team.